Gadgets
How To Sync Multiple Smart Bulbs Connect Together?

It’s very uncommon for consumers to run into problems when trying to install many smart bulbs into a single fixture, which is just one example of the many potential integration challenges that might arise while designing a smart home.
At first glance, this may seem to be a minor concern; after all, smart bulbs may be installed in much the same way as regular light bulbs.
Most of these bulbs, though, are meant to be operated by a smartphone app, and it’s not always easy to tell which ones belong to which lamps.
It is simply one potential snag in the transition to Smart bulbs for more involved lighting systems.
The bulbs may not physically fit in the light’s housing, or the fixture may have too many sockets that are too close together. Let’s take a look at some of these most typical issues, as well as how we may address them.
Light with many bulbs

This one is for the case when many bulbs have been successfully installed in the lamp in question, but the light is experiencing a software problem.
How do you make it such that each separate light source seems as if it were only one? To turn the light on or off, you now need to toggle three separate switches, which is quite inconvenient.
Different Smart home systems may have different answers, but we’ll guide how to use Home Assistant in this article.
Be aware that this is a very standard need, thus comparable procedures should exist for most traditional Smart home systems. Look at the alternatives listed in the section’s conclusion if your software doesn’t provide a feature analogous to this strategy.
Home Assistant Allows You to Combine Much Light
With Home Assistant, you can easily control a set of Smart lights with the flip of a single switch. You may easily combine many entities into a single one by using the “Light Group” connection, which is built right into Home Assistant’s core and requires no further installation.
Even though it’s setting can’t be adjusted via the user interface, it’s easy enough to implement in the configuration settings.
If your configuration file doesn’t already contain a “light” section, you may create one by copying and pasting the full text below.
In this situation, the first line specifies that the integration applies to the light category. In the next paragraph, we explain the series’ moniker (in this case, “Nightstand Lamp”).
Last but not least, we specify the entities we’d want to have as part of this set in the “entities” column. For this particular lamp, I have assigned each of the three bulbs a name and a number.
You’re free to give them whatever name you choose, but because each bulb must be installed separately, it makes sense to give them unique names.
It’s important to remember that the things you specify here must already exist and be configured before you add them here.
Pay close attention to the space in this document as well. Incorrect line breaks might prevent a computer from starting up properly.
The Home Assistant log file might provide useful information in this situation. Otherwise, you may use a YAML validator to make sure the file is set up properly.
After you’ve finished making changes to Home Assistant’s settings, you can restart it by clicking the option found in the UI’s Configuration menu under Server Controls.
The new entity will appear in the entity list when the system has finished restarting. The way I added it to my UI was to go to the settings cog, choose to configure UI, then click edit next to the card I wanted to add the light too, and then add the “Nightstand Lamp” object.
Each cluster of lights belonged to a larger whole.
The lights blend into one another after being clustered. The lights in the group may be managed as a single unit by opening the light control pane and selecting the Nightstand Lamp object.
Including an RGB-capable device in this set has resulted in the display of a colour wheel; however, this only applies to devices that have RGB capability.
Each component of the cluster has a full set of light controls. The cluster of lights functions as if it were a single fixture.
The nice thing about this grouping is that the parent level always has the same capabilities as the child level, regardless of the kind of device you place into the group.
That’s right, you can combine ON/OFF lights with RGB ones in the same group and control them all with a single-colour wheel and on/off toggle.
Combining many light bulbs into one Alexa-controlled fixture

Voice commands and the Alexa app are two ways that many people interact with Alexa to manage their smart homes. Similar to Home Assistant, the Alexa app can handle light with numerous bulbs, although not quite as effectively.
With the Alexa app, grouping is accomplished by selecting “Group” from the menu that shows when you click the “+” button in the upper left of the “Devices” tab.
As of this writing, however, there are significant issues with this approach, which we shall examine in further depth below. To begin here is how to integrate Alexa with several Smart lights in a single fixture.
To begin, check out the “Routines” section of the site. Just choose “Routines” from the “More” menu to get an entry. To add a new habit, choose the “+” symbol in the upper right corner of the screen. The Alexa app’s routines page
Name, trigger, and actions may all be specified on the new routine page. Alexa’s app’s “New Routine” screen
By selecting “Insert routine name,” we were able to give my new habit the name “Living room light red,” but you may give it anything you choose.
Even though you probably can predict the outcome, the next stage is to determine what steps to take. To get started, choose the add action option.
As the next screen loads, you’ll see a big number of options for different kinds of actions. If you’re looking for the “Smart Home” option, that’s the one you need to choose.
Identify The Gadget You’re Using Here.
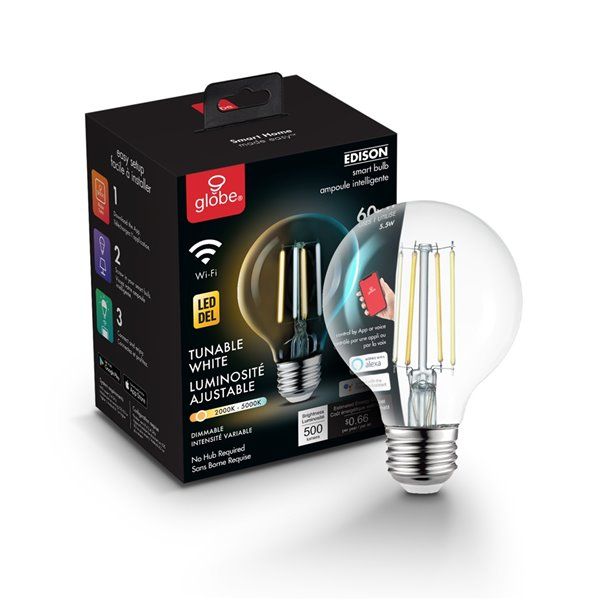
Choose “Lights” here. This method is not limited to lights; in fact, it may be used on any device that requires several controls.
On the next page, choose one of the light bulbs in your lamp as the new device you wish to add. To distinguish between them, we gave mine the names “Living room light bulb 1” and “Living room lamp bulb 2” when we added them to Alexa, although this is completely optional. Choose a light bulb from the drop-down menu, then proceed.
The screen where the device’s preferences may be adjusted
A “Power = On” and a “Set colour = Red” indicator indicates my preferences. We tell the routine to execute with the bulb turned on by specifying its power, but the “Set colour” feature does all the heavy lifting.
Choose the color you like and proceed. You should be brought back to the first screen in which you set the name.
To include all the lights in your fixture, repeat the “add action” procedure as many times as necessary. After you’re finished, you may customize the “When” trigger by remaining on the “Create Routine” screen.
The procedure’s ultimate configuration
As you can see, I have “When you speak” programmed as the trigger. I went with “red,” although it could have been anything.
If you’re interested, you may also utilize any of the other triggers. In this example, you’ll see that we have defined two separate actions, one for bulb 1 and another for bulb 2.
They are both designed to the same specifications; therefore, they will perform identically. On the upper right, you’ll see a button labeled “Done,” which you may use to permanently save this setup.
Each colour (red and blue) has its own set of predefined procedures.
So, we defined two distinct routines by going through the aforementioned steps twice. Both of them are for changing the color of the light, with one doing it in a red hue and the other in a blue one.
You may keep making new patterns until you reach a comfortable level. To activate a program and see the lamp’s color change, just click on the “play” button next to that routine.
Below is a link to a little video demonstration I made of this procedure in action.
How Do Alexa Communities Function?

It seems that the Alexa group function only supports fundamental operations at this time of writing. We clicked the plus icon on the devices page to make a new group and try it out.
In the end, we decided to call it the “Living Room Lamp” and install two light bulbs. After creating a group, clicking anywhere on the “Lights” page will toggle that group “ON” globally. That’s a promising initial look; if we choose it, we may examine it in further depth.
As far as We can tell, the Alexa group that controls my two lights just has an on/off option.
When you go to the advanced mode, you’ll see that there are no additional controls but the power button. At this point, I’m not sure who’s to blame.
Two of my trusty old Meross Wi-Fi Smart lights finally bit the dust, so I replaced them. The true mystery is whether or not this limitation is set by Alexa or the device’s manufacturer.
It turns out that this is not a simple question to resolve. Meross has the same problem in that it doesn’t allow you to create or join any kind of group chat inside the app.
So, is this an Alexa issue or a Smart light bulb issue? For the life of me, we can’t be sure. Please share your insight in the section below if you have the solution.
It’s a little frustrating that the Meross app doesn’t have a grouping feature like the one in Home Assistant, but there are workarounds available utilizing Scenes in the app that Alexa can connect to.
The ideal functionality would allow any device to be grouped with other devices that are functionally comparable, and then make those shared capabilities accessible to the collective.
A colour wheel is a necessary addition to any set of gadgets that can all change colour. If you’re already using Alexa but are missing this functionality, you can always link Alexa with Home Assistant to get the best of both worlds.
-
Problems arise when there are no means of grouping the data.
There is still hope if the smart home technology you use does not support groups. The problem may also be solved in another way.
The secret is to use a widely available feature called scenes to generate templates of each condition we want the light to be in.
Each state will have to be constructed as a scene, which is fine for turning things on and off but much less convenient when dealing with RGB.
Be sure to build two separate scenes utilizing just the devices included in the fixture by following the steps outlined by your Smart home system’s documentation.
Both the lights and the lights should be turned off in one of the situations. To activate or deactivate the light, just change the scene.
-
Physically flawed fixtures
As annoying as it would be to have smart lights in every socket, sometimes there is simply no way to make it work.
There are a few alternatives if this is the case, however, none of them is as beneficial as installing Smart lights everywhere.
-
Not using all the plugs or even most of them
Simple as it may seem, this approach has a chance of success and might end up saving you money. One or two bulbs may be sufficient if the fixture does not allow for direct viewing of the bulbs, and light output is not a priority.
If you use two bulbs, you’ll still need to resort to one of the methods outlined above, but if you use just one, the fixture can function as a standard light.
Changing to a Smart switch

Certain situations may benefit more from a Smart switch than a smart bulb. It might be useful if the fixture is too complex to accommodate individual light bulbs.
The major drawback is that you can only adjust the light’s intensity by turning it on and off, but at least you have that option.
Conclusion
Installing smart bulbs isn’t always a breeze, but there are usually workable alternatives that result in a functional configuration.
We showed how the group integration may be used to handle many devices as if they were one when employing several Smart bulbs in a single fixture.
Physical issues that might arise from poorly thought-out fixture designs were also discussed. Even though physical problems are more difficult to fix, we discovered that they may still be circumvented to get intelligent capabilities.
-
 Solutions2 years ago
How to Connect Your Vizio TV to WiFi Easily Without a Remote?
-

 Solutions2 years ago
Why is My Samsung TV Picture So Dark? Exploring the Possible Causes
-
 Accessories2 years ago
Can A Hdmi Splitter Extend The Display To 2 Monitors?
-

 Gadgets2 years ago
Fitbit Symbols Meaning: What Do The Fitbit Icons Mean?
-
 Accessories2 years ago
Do Smart Thermostats Run On Batteries? Let’s Find Out
-

 Solutions2 years ago
Why Can’t I Stream Netflix From My Phone? | Solution
-

 Solutions2 years ago
8 Ways How To Stop Google Home Nest From Crackling
-

 Solutions2 years ago
How To Fix Charging Not Available? Iphone Liquid Detected

